
Ready for Spring? The Ultimate RV Spring Cleaning Checklist
Spring is finally here, and for RV owners, that means one thing—it’s time to wake your home on wheels from its winter slumber. Before you point your truck toward your favorite campground, taking the time to thoroughly clean and inspect your RV can prevent expensive repairs, improve safety, and make every trip far more enjoyable.
Winter storage leaves behind far more than dust. Moisture, road grime, insects, oxidation, stale air, and overlooked maintenance items can quietly create problems that aren’t discovered until you’re hundreds of miles from home. A comprehensive RV spring cleaning gives you the perfect opportunity to inspect your investment while restoring that fresh, like-new feeling we all love.
After more than 50 years of camping, I’ve learned that spring cleaning isn’t simply about appearances. It’s one of the smartest preventative maintenance routines an RV owner can perform. Every hour spent preparing your RV at home can save days of frustration during camping season.
Let’s get your RV road-trip ready.

Why RV Spring Cleaning Matters
Many RV owners think of spring cleaning as cosmetic, but it serves a much larger purpose.
Cleaning allows you to inspect every inch of your RV for roof damage, loose sealant, cracked caulking, water intrusion, worn tires, insect nests, mold, and deteriorating components before they become expensive repairs.
Industry estimates consistently show that water intrusion remains one of the leading causes of costly RV repairs, making seasonal inspections one of the most valuable maintenance habits you can develop.
When your RV is clean, it’s also much easier to spot small issues before they become major problems.

Start Outside Before Moving Inside
Always begin with the exterior.
As dirt washes away, you’ll naturally inspect every surface while cleaning.
Give the Roof Special Attention
The roof protects everything underneath it.
Sweep away leaves, pine needles, branches, and accumulated debris before washing with an RV-approved cleaner designed for your roofing material.
While you’re up there, carefully inspect:
- Roof sealant
- Skylights
- Roof vents
- Air conditioner gasket
- Solar panel mounts
- Satellite mounts
- Ladder attachment points
Even tiny cracks can eventually allow moisture inside.
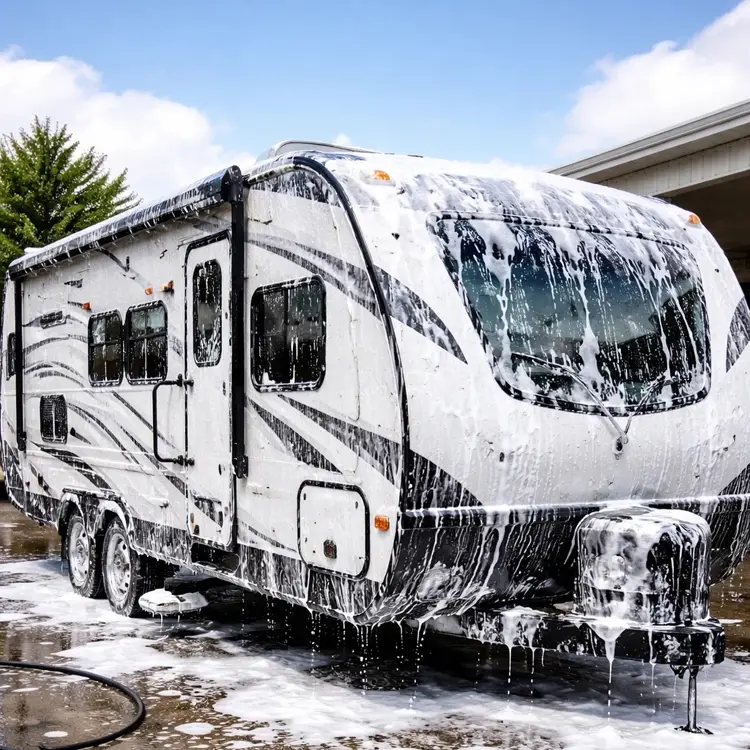
Wash Every Exterior Surface
Work from the roof downward.
Using biodegradable RV soap helps protect decals while removing road film, bug residue, pollen, and winter grime.
Pay extra attention to:
- Front cap bugs
- Window frames
- Storage compartment doors
- Slide-out seals
- Exterior lighting
- Hitch components
- Rear ladder
Avoid harsh household cleaners that may damage protective finishes.
Don’t Forget the Awning
A neglected awning can develop mildew, black streaks, and permanent stains.
Extend it completely.
Wash both sides using a soft brush and mild cleaner before allowing it to dry completely.
Rolling up a damp awning is one of the quickest ways to encourage mold growth.

Inspect Your Tires
Your tires deserve far more than a quick glance.
Look closely for:
- Sidewall cracking
- Uneven tread wear
- Bulges
- Embedded objects
- Valve stem damage
Check tire pressures only when tires are cold and inflate them according to your RV manufacturer’s specifications.
While you’re there, inspect:
- Lug nut torque
- Suspension components
- Brakes
- Wheel bearings
- Leaf springs
- Shocks
- Wet bolts
- Equalizers
Finish With Wax or Ceramic Protection
Once everything is clean, protect your investment.
A quality RV wax—or even better, a ceramic coating—helps:
- Reduce oxidation
- Protect decals
- Repel dirt
- Minimize water spotting
- Simplify future washing
The result is an RV that stays cleaner much longer.

Bring New Life to the Interior
Once the exterior is finished, it’s time to refresh the inside.
Winter storage often leaves behind stale air, dust, and clutter.
Creating a clean, organized interior makes every camping trip more enjoyable from day one.
Empty Every Cabinet
This is the perfect opportunity to remove everything.
Wipe shelves, vacuum corners, and inspect for signs of:
- Moisture
- Rodents
- Insects
- Loose hardware
You’ll probably discover items you carried all last season but never used.
Less clutter means less weight and easier organization.
Clean Every Surface
Dust settles everywhere.
Using microfiber cloths, clean:
- Ceiling vents
- Window frames
- Blinds
- Countertops
- Dinette
- Tables
- Cabinets
- Electronics
- Ceiling fans
Inspect windows for cracked caulking or evidence of moisture while cleaning.
Refresh the Kitchen
Nothing says “ready to camp” quite like a spotless kitchen.
Clean:
- Refrigerator
- Freezer
- Microwave
- Oven
- Cooktop
- Sink
- Pantry shelves
If odors linger, natural deodorizers like baking soda or activated charcoal often work wonders.
Deep Clean the Bathroom
The bathroom deserves extra attention after storage.
Sanitize:
- Toilet
- Sink
- Shower walls
- Shower doors
- Faucet aerators
- Medicine cabinet
Then flush and recharge your holding tanks using quality RV tank treatment designed specifically for black and gray tanks.
Wash the Walls
Most RV walls accumulate cooking residue, fingerprints, and dust surprisingly quickly.
A gentle cleaner approved for RV interiors removes buildup without damaging wall coverings.
You’ll immediately notice how much brighter your RV feels.
Clean the Floors Last
Always save the floors until the end.
Vacuum carpets thoroughly before treating any stains.
Sweep and mop hard flooring after every other cleaning task has been completed.
Freshen Upholstery and Mattresses
Fabric absorbs odors during storage.
Vacuum cushions, mattresses, curtains, and furniture before applying an upholstery-safe fabric refresher.
If possible, place cushions in direct sunlight for a few hours.
Sunlight naturally helps eliminate moisture and lingering odors.
Let Fresh Air Flow
One of the simplest improvements costs nothing.
Open every window and roof vent.
Run ceiling fans or vent fans if you’re connected to shore power.
Fresh air removes stale odors faster than almost anything else.
Reorganize for a Better Camping Season
Spring cleaning isn’t only about cleaning.
It’s about improving how your RV functions.
As you reload cabinets, ask yourself:
- Did we actually use this last season?
- Could this item serve two purposes?
- Is there a better storage solution?
Every season teaches us something new about traveling efficiently.
Small organizational improvements make life on the road much easier.
Frequently Asked Questions
How often should I deep clean my RV?
A thorough interior and exterior cleaning at the beginning and end of each camping season is ideal, with lighter cleanings throughout the year.
What’s the safest cleaner for RV exteriors?
Choose cleaners specifically labeled for RV use. They’re formulated to protect decals, fiberglass, aluminum, and rubber roofing materials.
Should I wax my RV every year?
Yes. Most fiberglass RVs benefit from an annual wax application. Ceramic coatings may last significantly longer depending on the product.
Is spring cleaning a good time to inspect roof sealant?
Absolutely. Spring is one of the best opportunities to identify cracks or gaps before spring rains can create water damage.
Can household cleaners damage my RV?
Yes. Bleach, ammonia, abrasive powders, and petroleum-based products can damage seals, finishes, flooring, and decals. Always verify product compatibility with RV materials.
Final Thoughts
There is something satisfying about stepping into a freshly cleaned RV, opening the windows, and knowing another season of adventure is just around the corner.
Spring cleaning isn’t simply another chore on your maintenance list. It’s your opportunity to reconnect with the RV that carries you to unforgettable destinations. Every cabinet you organize, every tire you inspect, every window you polish, and every seal you examine helps ensure your next journey begins with confidence instead of unexpected surprises.
After decades of camping, I’ve found that the best trips rarely begin when the engine starts—they begin in the driveway, with a little preparation and the excitement of knowing the open road is waiting.
So turn up your favorite music, gather your cleaning supplies, and give your RV the attention it deserves. Your future camping memories will thank you for it.
CHECK OUT ADDITIONAL THINGS TO DO
Embracing the Great Smoky Mountains


Leave a Reply